1 - OpenAPI使用指南
1、获取密钥
登录KubeCube,在右上角的下拉菜单中找到【密钥管理】页面,可以在该页面管理您账户的访问密钥对。
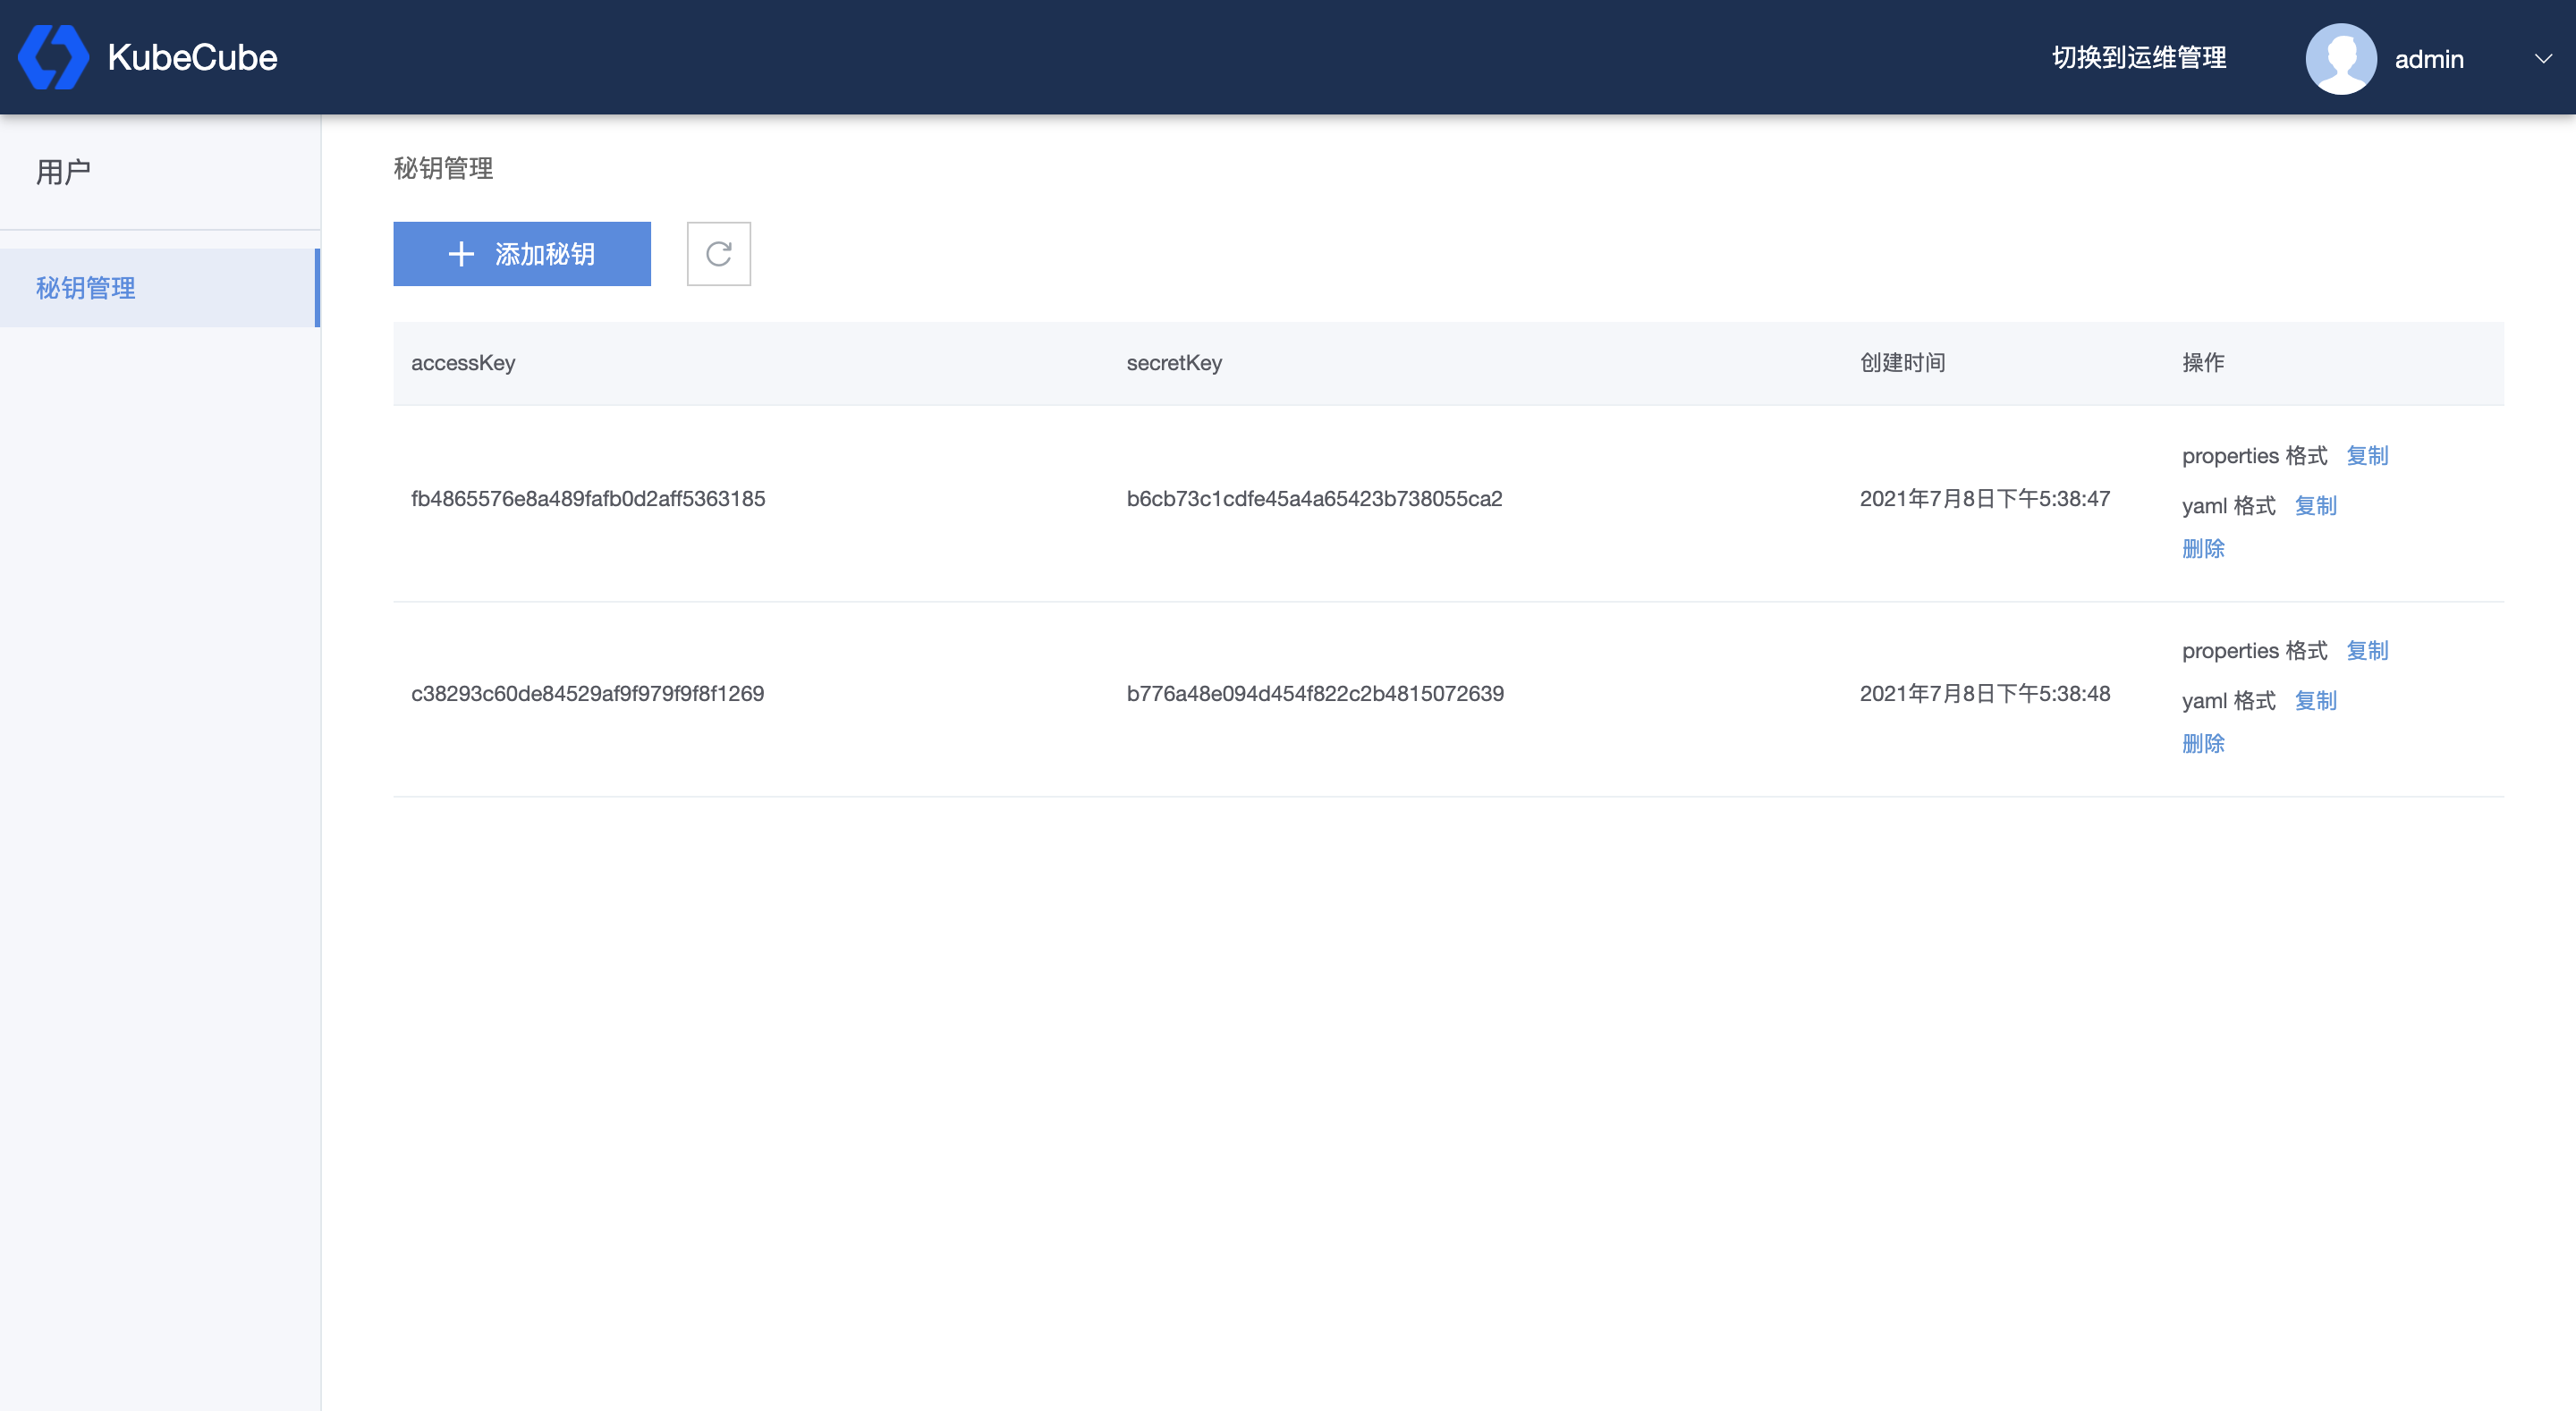
若进入到该页面中无密钥则点击【添加密钥】按钮创建,最多可以创建5对密钥。
2、根据密钥对生成 token
token有效期默认1小时,可以在启动时修改配置。
生成token的接口如下:
请求url
/api/v1/cube/key/token?accessKey=&secretKey=
Method:GET
描述:根据密钥对生成token,token有效期默认为1小时。
请求参数
| 参数名 | 说明 | 参数类型 | 是否必填 |
|---|---|---|---|
| accessKey | 密钥对Ak | string | 是 |
| secretKey | 密钥对Sk | string | 是 |
返回参数
| 参数名 | 说明 | 参数类型 |
|---|---|---|
| token | 可以用于访问KubeCube OpenAPI的token | string |
请求示例
curl https://kubecube.com/api/v1/cube/key/token?accessKey=0ad66675488c4855a07113a8e65719e3&secretKey=8f732a291795418f81cec6f1b064334a -X GET
返回示例
{"token":"eyJhbGciOiJIUzI1NiIsInR5cCI6IkpXVCJ9.eyJVc2VySW5mbyI6eyJ1c2VybmFtZSI6ImFkbWluIiwiZ3JvdXBzIjpbImt1YmVjdWJlIl19LCJleHAiOjE2MjQwMDMxMTJ9.DuR36vDDhLe_F5gw_T-8FCV7ZZVCJ1ye0dEpfELSa3g"}
3、使用 token 访问 API
在访问KubeCube openAPI时,在请求中加上请求头Authorization:Bearer ${token}以标识访问者的身份,其中${token}是第二步中获取到的token值,具体接口信息见下接口文档。
请求示例
curl -X GET -H 'Authorization:Bearer eyJhbGciOiJIUzI1NiIsInR5cCI6IkpXVCJ9.eyJVc2VySW5mbyI6eyJ1c2VybmFtZSI6ImFkbWluIiwiZ3JvdXBzIjpbImt1YmVjdWJlIl19LCJleHAiOjE2MjQwMDMxMTJ9.DuR36vDDhLe_F5gw_T-8FCV7ZZVCJ1ye0dEpfELSa3g' https://kubecube.com/api/v1/cube/proxy/clusters/pivot-cluster/api/v1/pods -k
得到结果
{"apiVersion":"v1","code":404,"details":{"kind":"pods","name":"kubecube"},"kind":"Status","message":"pods \"kubecube\" not found","metadata":{},"reason":"NotFound","status":"Failure"}
4、接口文档
访问 KubeCube 自研接口
点击【开发指南】-【自研接口文档】,该接口文档描述了 KubeCube 的自研接口。
访问 Kubernetes 资源
访问 Kubernetes 原生资源的接口文档如下:
请求url:
https://{管控节点IP}:30443/api/v1/cube/proxy/clusters/{clusterName}/*url?selector=&pageSize=&pageNum=&sortName=&sortOrder=sortFunc=
*url指的是直接调用 Kubernetes 时的接口,接口文档为:https://kubernetes.io/docs/reference/generated/kubernetes-api/v1.19/#watch-pod-v1-core。
selector:查询条件,支持精准匹配和模糊匹配:
- 精准匹配:eg. selector=key1=value1,key2=value2,key3=value3;
- 模糊匹配:eg. selector=key1~value1,key2~value2,key3~value3;
- 混合匹配:eg. selector=key1~value1,key2=value2,key3=value3;
pageSize:查询结果每页的数量,默认值为10;
pageNum:查询结果的页数,默认为1;
sortName:查询结果排序依据的字段,默认为 “metadata.name”;
sortOrder:查询结果正序或倒序显示:正序为 “asc”,倒序为 “desc”,默认为正序;
sortFunc:sortName 的数据类型,默认为 “string”。
返回参数同 Kubernetes 的返回参数。
请求示例
如果需要查询某个namespace下的 deployment 列表,并希望结果以 deployment 的创建时间倒序排序、以20条结果为1页,返回第2页的结果:
1、查询 Kubernetes 接口文档:查询 deployment 列表的接口为
GET /apis/apps/v1/namespaces/{namespace}/deployments
2、因此, KubeCube 查询 deployment 的对应接口为
GET /api/v1/cube/proxy/clusters/{clusterName}/apis/apps/v1/namespaces/{namespace}/deployments?sortName=CreationTimestamp&sortOrder=desc&pageSize=20&pageNum=2
3、使用 token 访问则为:
curl -X GET -H 'Authorization:Bearer eyJhbGciOiJIUzI1NiIsInR5cCI6IkpXVCJ9.eyJVc2VySW5mbyI6eyJ1c2VybmFtZSI6ImFkbWluIiwiZ3JvdXBzIjpbImt1YmVjdWJlIl19LCJleHAiOjE2MjQ2MTY3MjZ9.FCfuVzADMAgYeOm39Wlhs-3B6kW-Z6bZ9js1lKoNub0' https://kubecube.com/api/v1/cube/proxy/clusters/pivot-cluster/apis/apps/v1/namespaces/namespaceA/deployments?sortName=metadata.creationTimestamp&sortOrder=desc&pageSize=20&pageNum=2 -k
访问 CRD 资源
访问 CRD 资源的接口文档如下:
请求url:
https://{管控节点IP}:30443/api/v1/cube/proxy/clusters/{clusterName}/apis/{CRDGroup}/v1/{CRDKinds}/*url?selector=&pageSize=&pageNum=&sortName=&sortOrder=sortFunc=
参数含义同上。
请求示例
如果需要查询"pivot-cluster"集群里的租户列表,则对应接口为:
GET /api/v1/cube/proxy/clusters/pivot-cluster/apis/tenant.kubecube.io/v1/tenants
使用 token 访问则为:
curl -X GET -H 'Authorization:Bearer eyJhbGciOiJIUzI1NiIsInR5cCI6IkpXVCJ9.eyJVc2VySW5mbyI6eyJ1c2VybmFtZSI6ImFkbWluIiwiZ3JvdXBzIjpbImt1YmVjdWJlIl19LCJleHAiOjE2MjQ2MTY3MjZ9.FCfuVzADMAgYeOm39Wlhs-3B6kW-Z6bZ9js1lKoNub0' https://kubecube.com/api/v1/cube/proxy/clusters/pivot-cluster/apis/tenant.kubecube.io/v1/tenants -k
2 - 自研接口文档
3 - 参与贡献
Welcome to KubeCube community! If you are looking for information on how to join us, you are in the right place. We encourage you to help out by reporting issues, improving documentation, fixing bugs, or adding new features. Every contribution is precious for KubeCube.
Reporting issues
To be honest, we regard every user of KubeCube as a very kind contributor. After experiencing KubeCube, you may have some feedback for the project. Then feel free to open an issue.
There are lot of cases when you could open an issue:
- bug report
- feature request
- performance issues
- feature proposal
- feature design
- help wanted
- doc incomplete
- test improvement
- any questions on project
- …
Also we must remind that when filing a new issue, please remember to remove the sensitive data from your post. Sensitive data could be password, secret key, network locations, private business data and so on.
Contribution
To put forward a PR, we assume you have registered a GitHub ID. Then you could finish the preparation in the following steps:
- Fork the repository you wish to work on. You just need to click the button Fork in right-left of project repository main page. Then you will end up with your repository in your GitHub username.
- Clone your own repository to develop locally. Use git clone https://github.com/
/ .git to clone repository to your local machine. Then you can create new branches to finish the change you wish to make. - Set remote upstream to be https://github.com/kubecube-io/
.git using the following two commands:
git remote add upstream https://github.com/kubecube-io/<project>.git
git remote set-url --push upstream no-pushing
Adding this, we can easily synchronize local branches with upstream branches.
- Create a branch to add a new feature or fix issues
Update local working directory:
cd <project>
git fetch upstream
git checkout master
git rebase upstream/master
Create a new branch:
git checkout -b <new-branch>
Make any change on the new-branch then build and test your codes.
PR Description
PR is the only way to make changes to KubeCube project files. To help reviewers better get your purpose, PR description could not be too detailed. We encourage contributors to follow the PR template to finish the pull request.
Developing Environment
As a contributor, if you want to make any contribution to KubeCube project, we should reach an agreement on the version of tools used in the development environment. Here are some dependents with specific version:
Golang : v1.14+ (1.16 is best) Kubernetes: v1.18+
Developing guide
There’s a Makefile in the root folder which describes the options to build and install. Here are some common ones:
# Run the tests
make test

# Swag doc generate
make swag-gen

# Cube binary build
make docker-build-cube

# Warden binary build
make docker-build-warden

# Install dependence into env
make install
If you want to start KubeCube and Warden locally to work with a Kubernetes cluster, you should follow the debug guide.
Join KubeCube as a member
It is also welcomed to join KubeCube team if you are willing to participate in KubeCube community continuously and keep active.
Requirements
- Have read the Contributing to KubeCube carefully
- Have submitted multi PRs to the community
- Be active in the community, may including but not limited
- Submitting or commenting on issues
- Contributing PRs to the community
- Reviewing PRs in the community
How to do it
You can try in either of two ways:
Report a issues
Submit a PR in the project repo
4 - 如何调试
如何进行本地调试
安装 docker
参照 official docker installation guide.
安装 minikube
参照 official minikube installation guide.
使用 kubeadm 创建集群
参照 official creating a cluster with kubeadm
本地调试
安装 manifests 依赖
⚠️ K8S_API_SERVER_ENDPOINT 为 k8s 的 api-server 地址,请根据环境填入对应的地址
K8S_API_SERVER_ENDPOINT="0.0.0.0:6443"
bash hack/install_local.sh ${K8S_API_SERVER_ENDPOINT}
调试 kubecube
make run-cube
调试 warden
make run-warden
卸载 manifests 依赖
bash hack/uninstall_local.sh
使用 pod 进行调试
请参照 all in one 部署 进行 kubecube 安装
构建 kubecube 镜像
make docker-build-cube IMG={image-tag}
构建 warden 镜像
make docker-build-wardeb IMG={image-tag}
使用构建完成的镜像替换对应 deployment 中的镜像,并使用 kubectl logs 进行 debug